 On Saturday, I took a workshop at the Japanese Paper Place warehouse on using konnyaku and beeswax with Japanese paper. Although I'll use the konnyaku technique more than the beeswax one because of things like set-up, necessary materials, and my general style anyway, most people to whom I've mentioned the workshop are far more keen on the beeswax bit. In fact, I was keener on it to because I wanted to see if it was worth the outlay of cash (which is, admittedly, not very large, but it's still a chunk of change I could use to buy more paint) and the time involved. At some point in the future, it'll be worth it but for now it's probably not.
We played around with natural beeswax because the instructor considers it safer than purified waxes. Since it's not purified there are no chemical additives to worry about and it's cheaper (about half the price!). It also adds a beautiful golden hue to everything.
The set-up is straight-forward. You use an electric frying pan as a water bath and place a pot with your beeswax in it to melt. Once it's melted, take whatever it is that you'd like to dip and stick it in. Use dedicated tongues to pull it out. Let the excess drip off and then lay down somewhere safe. Before the wax completely dries, you can mold the paper. Someone at the workshop played around with a hairdryer to help with the molding.
You can also iron the beeswax-dipped paper with a foil-covered iron between muchos paper. The layer of beeswax is much thinner on ironed pieces.
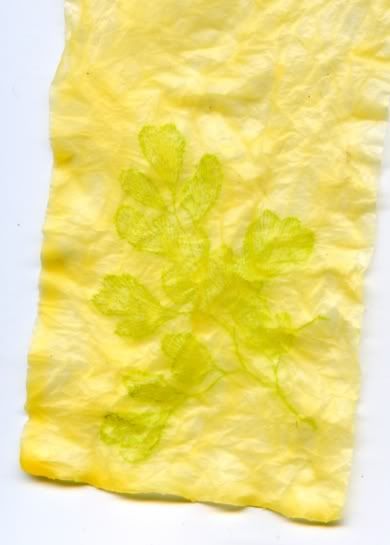
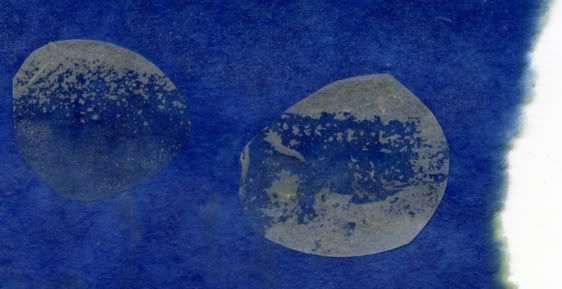 I was primarily interested in layering pieces but most of my experiments didn't turn out that well. To the right is what I consider my most successful piece. If you look closely you can barely see the edge of the top piece of paper, which was a tissue with inclusions. The key to success is knowing your iron and from later experiments with attaching top sheets, I obviously didn't get to know the workshop iron very well. You essentially use the iron to attach collage elements. I found it easiest to join two waxed sheets, although theoretically if the paper you're attaching is thin enough, you don't need to dip it in wax. I had a tendency to iron all the wax right out of elements while attaching things. See the blue piece opposite my successful piece. It does look pretty mysterious but it wasn't what I was trying to do.
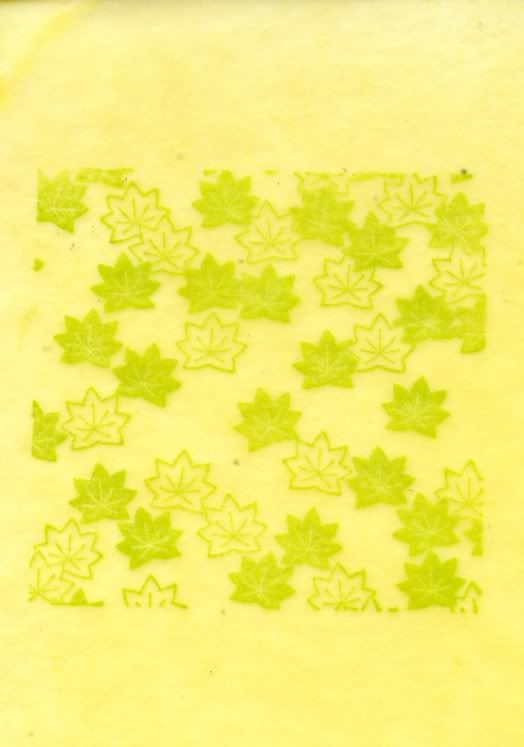
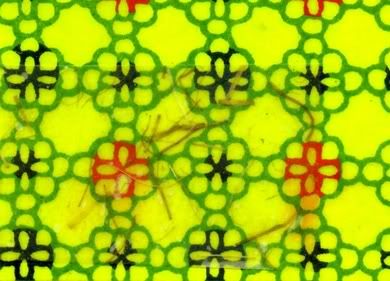
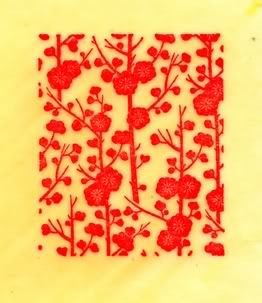
My last experiments. Above is a piece of kozo that I stamped with chalk ink (VersaMagic, to be precise). It's hard to tell from the scan but the image doesn't actually stand out that much. It receded into the paper after applying beeswax. The paper below, however, was stamped with normal pigment ink and it looks as though it's sitting on top of the wax, which I thought was really tremendously cool.
So now I have all these pieces of beeswax-dipped paper and I'm not quite sure what to do with them. Any suggestions?

4 comments:
The last one is GREAT! How big is it? Is it framable?
Merci! The stamped area of the last one is about 3" x 2". I cropped the scan so the wax area is quite a bit larger. Ptichka suggested sewing it onto the front of a card. But yeah, I could totally frame it. It smells good too.
Thanks for the info! I like the idea of sewing them on the front of a card. It would be such a treat to receive that card, what with the texture & smell and all.
These are beautiful!
Post a Comment